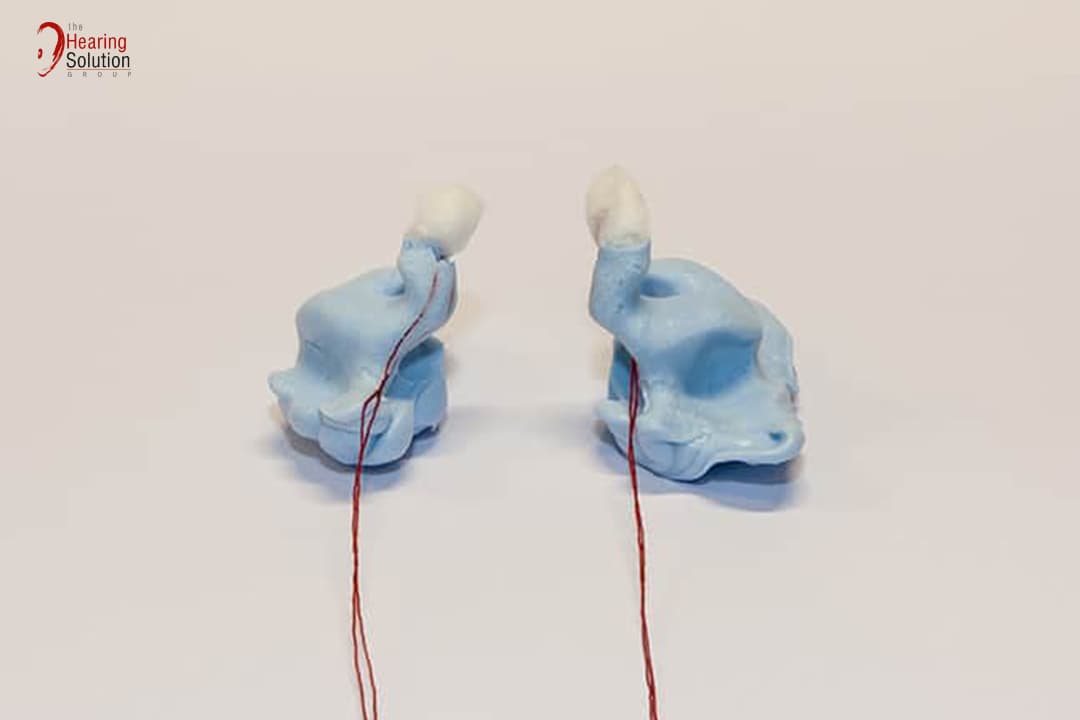
Hearing aids are not one-size-fits-all and cannot be bought off the shelf because each ear has a unique bone structure that will affect how hearing aids fit. If you’re suffering from hearing loss and need to get a hearing aid, you will need to first make an ear impression to customise one that fits you properly.
Having a hearing aid customised to the shape of your ears provides the perfect fit and contributes to consistent listening effectiveness. In this article, learn more about ear impressions and how they’re made.
What are Ear Impressions?
Ear impressions are custom-made models of your ears used by manufacturers to create hearing aids that fit your ears perfectly. They are typically created by the audiologist before being sent to the hearing aid manufacturer.
The most important step in fitting a hearing aid is taking an ear impression. In order to create the most comfortable fit, it must accurately depict the shape of the outer ear and ear canal. Hearing aids that fit well in your ears provide minimal residual volume and increase the output you receive at the eardrum for better hearing.
How are Ear Impressions made?
1. Examine the Ear
Your outer ears and ear canal will be examined first to determine whether an ear impression can be made and what needs to be done to ensure the most accurate impression. The audiologist will examine the shape and contours of your external ear and ear canal; the presence of any problems such as ear wax, enlargement, trauma, or disease; as well as the overall size of the impression to be taken and the size and shape of the ear canal.
2. Insert a Cotton Stop
A cotton block will then be inserted into your ear canal to prevent any foreign objects or materials from flowing into your middle ear, causing injuries or damage.
3. Preparing Materials
The audiologist will then mix and prepare the materials required to make the ear impression, which is a two-part high-quality material made up of a silicone base and a silicone hardener. These ingredients will be kneaded together until they form a uniform colour. It will then be placed into a plastic syringe and compressed with the plunger to remove any air pockets.
4. Bite Block
A bite block will be given to you to bite on between your front teeth. This helps to slightly enlarge your ear canal and produce larger ear impressions to create larger ear plugs or moulds that fit snugly in your ear. This prevents the ear plug or mould from falling out from your ear when you open your mouth to talk, sing, or eat as our ear canals may expand slightly when we open our mouths.
5. Fill Ear Canal and Outer Ear
Once you’re biting on the bite block and the impression material is prepared, the audiologist will insert the tip of the syringe into your ear canal and slowly squeeze the material to fill your ear canal. After filling the ear canal, the syringe will be withdrawn to fill the outer ear.
6. Cure Ear Impression
Once every corner of your ear has been filled with the impression material, it will be left to cure for 5 minutes. This ensures that the material is firm and will retain its correct shape when removed.
7. Remove and Inspect
Finally, when the impression is fully cured and firm to the touch, it will be removed from your ear gently and carefully inspected for accuracy.
If you need a hearing aid fitted, it is important that you get an ear impression made for accuracy. We hope that this article has given you a better understanding of how the process works so that you can rest assured that the procedure is a simple and painless one.
In need of a new hearing aid? The Hearing Solution Group operates a number of hearing clinics in Singapore, providing hearing solutions to help you hear better. Contact us today or call us at 63370090 to schedule a hearing test.

 Find Us
 Call Us